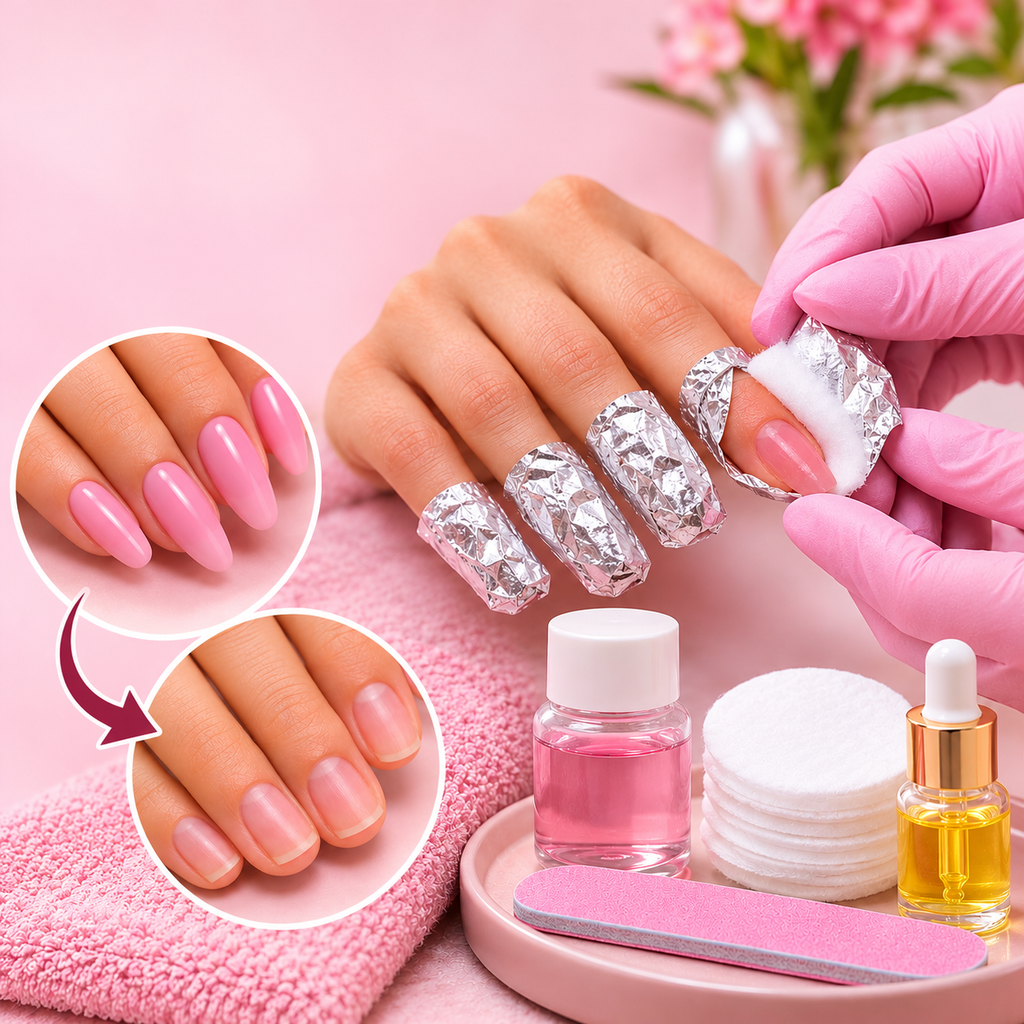
How to Remove Nail Extension Safely?
Nail extensions are a beautiful way to enhance your nails with extra length, attractive shapes and creative designs. Whether you prefer acrylic, gel, polygel or soft gel extensions, proper removal is just as important as application. Removing nail extensions incorrectly can weaken your natural nails, cause peeling or lead to nail damage.
If you are wondering how to remove nail extension safely, it is important to understand that different nail extension systems require different removal techniques. Some products can be softened with acetone, while others need professional filing.
At Raksnail Studio, we believe beautiful nails start with proper nail preparation, quality products and healthy nail care. In this guide, we explain different nail extension removal methods, essential tools and aftercare tips to help protect your natural nails.
Why Is Safe Nail Extension Removal Important?
Nail extensions are designed to stay attached to your natural nails for an extended period. However, pulling, peeling or forcefully removing them can damage the natural nail plate.
Safe removal helps to:
- Prevent natural nail peeling and breakage.
- Reduce unnecessary thinning of the nail plate.
- Protect the surrounding skin and cuticles.
- Maintain healthier natural nails.
- Reduce the risk of irritation and injury.
Professional removal is especially important for hard gel, thick extensions and products that cannot be dissolved with acetone.
Essential Tools Required for Nail Extension Removal
Before starting the removal process, make sure you have the appropriate tools for your particular nail system.
Here are some commonly used nail removal supplies:
- Nail clippers or nail cutters.
- Nail files with suitable grit.
- Acetone for compatible soak-off products.
- Cotton pads or cotton balls.
- Aluminium foil or suitable nail wraps.
- Cuticle oil.
- Hand moisturiser.
- A clean towel.
- Protective petroleum jelly.
Always use products according to their manufacturer’s instructions and work in a well-ventilated area when using acetone.
How to Remove Nail Extension Safely: Step-by-Step Guide
The removal method depends on the type of nail extension you are wearing. Follow the appropriate method rather than using one removal technique for every product.
1. How to Remove Acrylic Nail Extensions
Acrylic extensions are made using acrylic powder and liquid monomer. Once hardened, they form a firm enhancement that generally requires acetone-based removal.
Step-by-Step Removal
Step 1: Trim the Extension
Carefully shorten the artificial nail length using suitable nail clippers. Avoid cutting too close to your natural nail.
Step 2: File the Top Layer
Gently file the artificial surface to reduce its thickness and remove the topcoat. Avoid filing into your natural nail.
Step 3: Protect Your Skin
Apply a thin layer of petroleum jelly around the cuticles and surrounding skin to help reduce acetone exposure.
Step 4: Use Acetone
Place acetone-soaked cotton over each nail and secure it with suitable foil wraps. Alternatively, use a suitable soaking method according to the product instructions.
Step 5: Allow the Acrylic to Soften
Wait for the product to soften. The time required varies depending on the acrylic system and thickness.
Step 6: Remove Gently
Once softened, gently remove the loosened acrylic without scraping or forcing it. If the product remains firmly attached, repeat the appropriate soaking process or visit a nail professional.
Never pull or pry acrylic extensions from the natural nail.
2. How to Remove Gel Nail Extensions
Gel extensions can be made using different gel formulations, so it is important to identify the product before removal.
Step-by-Step Removal
Step 1: Identify the Gel Type
Check whether your gel enhancement is soak-off gel or hard gel. These products have different removal requirements.
Step 2: Shorten the Extensions
If the product instructions permit, carefully reduce the artificial length.
Step 3: Remove the Surface Coating
For a compatible soak-off system, gently remove the surface coating according to the manufacturer’s instructions.
Step 4: Apply the Recommended Removal Method
Use the manufacturer’s recommended removal product or acetone-based method for soak-off gel systems.
Step 5: Allow the Product to Soften
Give the product sufficient time to soften. Do not scrape or peel away gel that remains attached.
Step 6: Clean the Nails
Once the product has released easily, gently clean the nail surface and wash your hands.
Important: Hard gel is generally file-off rather than soak-off. It should be reduced by a trained nail technician without filing into the natural nail.
3. How to Remove Polygel Nail Extensions
Polygel is a hybrid nail enhancement product that combines characteristics of gel and acrylic systems. It creates a strong structure and usually requires careful filing for removal.
Recommended Removal Process
- Shorten the extension carefully.
- Reduce the bulk of the polygel using an appropriate professional filing technique.
- Keep the natural nail plate protected.
- Leave a thin layer of product if complete removal risks damaging the natural nail.
- Ask a professional nail technician to complete the removal if you are unsure.
Do not assume polygel can be removed by soaking in acetone. Follow the specific product manufacturer’s instructions.
4. How to Remove Soft Gel Nail Tips
Soft gel nail tips are pre-shaped extensions attached using a compatible gel adhesive.
Many soft gel systems are designed for soak-off removal, but the process depends on the adhesive and tip formulation.
Removal Steps
- Shorten the extension if necessary.
- Gently reduce the topcoat or product surface as instructed.
- Apply the recommended removal solution.
- Allow the adhesive and tip to soften.
- Remove the tip only when it releases easily.
- Avoid pulling or forcefully lifting the artificial tip.
If the tip does not release easily, stop and consult a professional.
Common Mistakes to Avoid During Nail Extension Removal
Knowing what not to do is just as important as understanding the removal process.
Avoid these common mistakes:
- Peeling Artificial Nails: Pulling extensions off can remove layers of your natural nail.
- Excessive Filing: Aggressive filing can thin and weaken the natural nail plate.
- Incorrect Acetone Usage: Not every nail enhancement can be removed with acetone.
- Using Sharp Tools: Inserting sharp tools underneath extensions can injure the nail.
- Ignoring Nail Damage: Pain, redness, swelling or unusual nail changes should not be ignored.
- Skipping Aftercare: Natural nails and surrounding skin may become dry after removal.
Always choose the correct removal technique for the nail product you are using.
Nail Care Tips After Removing Nail Extensions
After removing artificial nails, give your natural nails attention and proper care.
Here are some useful aftercare tips:
1. Keep Your Nails Short
Shorter nails are easier to manage and less likely to catch on clothing or other objects.
2. Apply Cuticle Oil
Use cuticle oil regularly to moisturise the surrounding skin and cuticles.
3. Moisturise Your Hands
Apply a suitable hand cream to reduce dryness after using nail removal products.
4. Avoid Aggressive Buffing
Do not excessively buff the natural nail surface to make it look smooth.
5. Take a Break from Nail Enhancements
Consider taking a break from artificial nail applications if your natural nails feel weak, brittle or damaged.
6. Watch for Unusual Changes
If you notice persistent pain, swelling, redness, nail separation or unusual discolouration, consult a dermatologist.
Conclusion
Learning how to remove nail extension safely is essential for maintaining healthy natural nails and preventing unnecessary damage. Acrylic extensions and compatible soak-off gel products may require acetone-based removal, while hard gel and polygel generally require careful professional filing. Soft gel tips must be removed according to their specific product instructions.
Never peel, pull or force artificial nails from your natural nail plate. When in doubt, professional removal is the safest choice.
At Raksnail Studio, we encourage nail enthusiasts, salon owners and professional nail artists to prioritise proper nail preparation, safe application and careful removal techniques.
Explore quality nail art products and accessories at https://raksnailstudio.com/ and discover more tips to support your nail art journey.
Frequently Asked Questions (FAQs)
1. Can I remove nail extensions at home?
Some compatible soak-off extensions can be removed at home by following the manufacturer’s instructions. Hard gel and other file-off systems are better removed by a trained professional.
2. Can I remove acrylic nails using acetone?
Yes. Acrylic extensions are generally removed using acetone-based soaking methods. The product should be softened before it is gently removed.
3. Can I remove hard gel nails with acetone?
No. Traditional hard gel is generally not soak-off and usually requires careful filing by a trained nail technician.
4. Does removing nail extensions damage natural nails?
Incorrect removal can cause peeling, thinning and breakage. Proper removal techniques help reduce the risk of natural nail damage.
5. How long does nail extension removal take?
The time depends on the nail extension type, thickness and removal method. Avoid rushing the process to prevent damage.
6. What should I apply after removing nail extensions?
Use cuticle oil and a moisturising hand cream. Keep your nails clean and avoid aggressive filing.
7. Should I apply new nail extensions immediately after removal?
If your natural nails are healthy, a professional can assess whether another application is appropriate. If your nails are damaged or painful, allow them to recover and seek professional advice.